AR Trace Sketch
- 0.0
- Rating
- 100.00K
- Installs
- Free
- Price
 Analysis by App-foxy
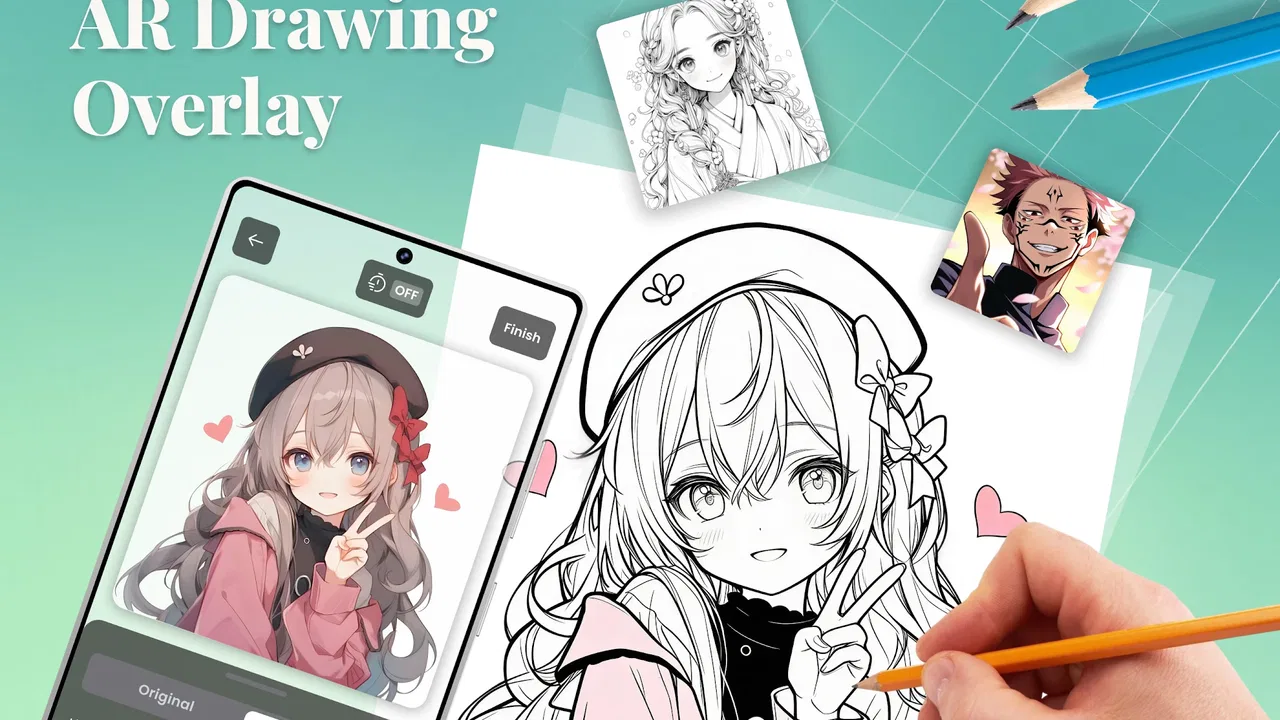
I approached AR Trace Sketch as a practical drawing companion rather than a replacement for learning how to draw. Its central idea is simple: use an augmented-reality view to place a reference photo over your paper, adjust the overlay, and work through guided lessons while your hand gradually builds confidence. That makes it especially interesting for people who can recognize a good image but struggle to turn it into lines on a blank page.
In my experience, the app makes the most sense when you have a specific drawing task in front of you. Maybe you want to sketch a pet from a phone photo, copy the broad shape of a household object, or practice proportions before attempting a more personal illustration. Instead of switching constantly between a reference image and your paper, the AR approach keeps the source and the drawing surface connected. The real value is not automatic drawing; it is reducing the first barrier between seeing and making.
NimbusApps presents this as an Art & Design app, and that description fits better than calling it a general photo editor or a full digital art studio. It is free to start, rated for Everyone, and has attracted over one hundred thousand installs. The current release is version 1.2.1, while optional in-app purchases range from forty-nine cents to nearly fifteen dollars per item. Those purchases are worth keeping in mind if you expect to use every lesson or extended tool, but the basic appeal is easy to understand without treating the app as a professional illustration package.
You May Also Like

 Blood Strike: 2.5 Anniversary
Blood Strike’s Loadouts Turn Every Drop Into a Tactical Gamble
A close look at Blood Strike’s custom loadouts: how fast access to signature weapons reshapes its battle royale rhythm, rewards preparation, and narrows the gap between fights.

 Pandora - Music & Podcasts
Pandora’s Music Is Easy to Start, but Harder to Recover
Pandora’s strength is its low-effort path from a seed to a station. Its weak spot is how much confidence it asks you to place in connection, setup, and quiet recovery.
 8 Ball Pool
 Is Built on Rivalries, Rematches, and Routine
A close look at the rivalries, rematches, shared routines, and unanswered safety questions that turn a quick pool match into a persistent mobile community.

 Samsung Music
’s Quiet Strength Is Playing What You Already Own
Its reach comes less from spectacle than from dependable access to a personal library. That simplicity is both the app’s strongest retention engine and its ceiling.

 AccuWeather: Weather Radar
AccuWeather Review: A Quick, Clear Forecast for Everyday Decisions
For everyday plans, the best forecast is the one you can understand quickly. AccuWeather makes rain timing, radar, and local conditions easy to act on, with a few trade-offs.

 Hill Climb Racing
Why Hill Climb Racing Still Turns Crashes Into One More Run
A tiny car, a bumpy hill and one more upgrade: Hill Climb Racing keeps resurfacing because its simple chaos makes every near-miss feel personal.
More From Our News Desk


From a blank page to a finished practice drawing
I’ll focus this section on turning a blank page into a manageable first attempt, especially how choosing a clear subject and setting a modest goal can keep practice from feeling overwhelming. I’ll also look at how the drawing process changes once the reference is in place, before moving on to the practical setup and pace of a session.
Choosing the right starting point
The first decision is not inside the app; it is the subject you bring to it. A clean, well-lit photo with a clear silhouette is much easier to trace than a busy group scene, a reflective object, or a portrait with hair blending into the background. I would begin with one recognizable subject and a composition that leaves some breathing room around it. This gives the overlay a useful shape instead of turning the page into a confusing collection of edges.
This is one of the app’s less obvious lessons: AR tracing does not remove the need to judge an image. It simply makes certain judgments easier to act on. If the source photo has a dramatic perspective, overlapping objects, or very soft boundaries, the app can place that reference in front of you, but it cannot decide which lines deserve attention. Beginners often get better results by choosing a less exciting image with strong contours rather than a beautiful image that is difficult to interpret.
I also found it helpful to decide what the drawing is meant to accomplish before starting. If the goal is a quick proportion exercise, I would focus on the outer shape and a few major internal divisions. If the goal is a finished pencil study, I would use the overlay as a temporary guide and then spend more time observing light, texture, and small changes that a simple tracing pass will not explain. The same setup can support both activities, but the expected result should be different.
Setting up the AR view
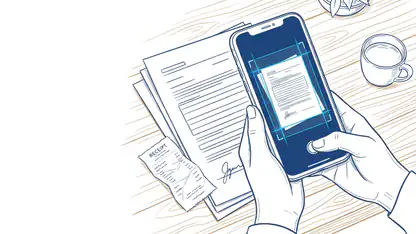
The core workflow places the reference image over the physical drawing area through the device camera. In practical terms, I would put the paper on a stable surface, position the phone so the page remains visible, and then adjust the reference until its scale and placement feel comfortable. The adjustable overlay matters here because a reference that is too large, too faint, or awkwardly positioned quickly becomes tiring to follow.
Rather than trying to match every visible detail immediately, I recommend beginning with the largest landmarks. Find the top, bottom, left, and right limits of the subject, then check the angle of its main axis. This creates a simple mental frame before smaller marks enter the picture. It is a more reliable workflow than starting with an eye, wheel, leaf, or other tempting detail and discovering later that the whole subject is out of proportion.
The phone’s position becomes part of the handoff between the digital reference and the physical page. If the device shifts while you work, the projected relationship can become less useful, so a stable setup is preferable to holding the phone in one hand and drawing with the other. A small stand or improvised support can make the session more comfortable, even though the app itself is doing the visual alignment. This is an important trade-off: the software simplifies placement, but the user still has to create a workable physical arrangement.
For a short practice session, I would keep the paper size modest and use a firm surface. A large sheet may sound more ambitious, but it can force the device farther away or make the overlay harder to follow. A smaller page lets you test the workflow quickly, identify whether the image is suitable, and avoid wasting time on a setup that does not feel natural.
Using the adjustable overlay without becoming dependent on it
The overlay is most useful as a planning aid. I would first use it to lightly establish the outer contour, then reduce my dependence on it by checking the reference and the drawing separately. That small change turns the session from passive copying into observation practice. You are still receiving help with placement, but you are also learning to remember angles, spacing, and relationships.
A common mistake is to follow every visible edge with equal importance. Photographs contain shadows, reflections, textures, and background boundaries that may not belong in the final drawing. I would treat the overlay as a menu of possibilities, not an instruction to reproduce every line. For example, a shadow may help explain the form, while a random background edge may only distract from it. The best result comes from deciding what to keep after the app has made the reference easier to inspect.
Another useful approach is to work in passes. Begin with a light construction layer, pause to compare the overall shape, and only then strengthen the lines that genuinely describe the subject. This is particularly helpful when practicing faces or objects with repeated parts. Small errors are easier to correct before they become dark, confident marks. The app supports the placement stage, but the quality of the final drawing still depends on restraint and revision.
Moving from tracing to guided practice
The guided lessons give the workflow a more structured direction than a reference image alone. I would use them when I want a clear exercise rather than an open-ended sketch. A lesson can be useful after a frustrating freehand attempt because it narrows the task and gives you a sequence to follow. It also helps answer the question many beginners have after opening a drawing app: what should I practice first?
There is a meaningful difference between tracing a single image and following a lesson. Tracing is immediate and motivating because the subject is familiar. A guided activity is better for building habits such as starting with broad shapes, checking proportions, and delaying detail. I would alternate between the two rather than choosing only one. The reference-photo workflow keeps practice personal, while the lessons prevent you from repeating the same comfortable shortcut every time.
If you are using the app with a child, the Everyone rating makes the concept approachable for a broad audience, but supervision can still improve the experience. The child may want to draw every line they see, while a short explanation about choosing major shapes first can make the result less overwhelming. For an adult beginner, the same principle applies: a smaller target and a clear sequence usually produce more progress than an ambitious image covered in corrections.
The handoff from screen to paper
The most important handoff happens when the user stops looking only at the screen and starts evaluating the physical drawing. That is where I would deliberately lift my attention from the overlay. Does the sketch still make sense when viewed on its own? Are the main shapes balanced? Is the line quality consistent? If the answer is no, I would correct the paper rather than endlessly adjusting the reference.
This separation also protects the learning benefit. If the overlay remains the only authority, it is easy to produce a close copy without understanding why the image works. After a first pass, I would hide or ignore the guide for a few minutes and add simple shading or structural details from observation. That exercise exposes whether the tracing helped you understand the form or merely helped you follow a contour.
The final handoff is from practice drawing to personal use. A traced outline can become the basis for a greeting card, a study page, a design draft, or a more expressive illustration. I would not treat the first pass as the finished artwork. Instead, I would use it as scaffolding, then redraw selected areas, simplify others, and add decisions that belong to me. That is where the app becomes more than a shortcut.
What the finished result is good at
AR Trace Sketch is strongest when the desired outcome is a confidently placed sketch. It can help someone get a subject onto paper with fewer early proportion problems, which is often enough to make practice feel rewarding. It is also useful for visualizing how a photo might translate into a drawing before committing to a more detailed version.
For an everyday example, imagine wanting to draw a bicycle but repeatedly making the wheels too small or placing the frame at the wrong angle. I would choose a clear side-view photo, set the overlay over a sheet of paper, mark the wheel positions and main frame lines, and then remove the guide before adding details. The app helps with the initial geometry, while the later passes remain a drawing exercise. That division of labor is more valuable than simply copying a finished image.
It can also serve as a low-pressure warm-up. Ten minutes spent tracing a simple object may be a better entry into a drawing session than staring at a blank page. Once the hand is moving, I would continue with a freehand variation: change the angle, simplify the shape, or draw the same subject from memory. This keeps the app from becoming the only way you work.
Compared with a traditional printed reference, the AR method is more direct because the image and paper occupy the same visual setup. A printed photo encourages observation and independent measuring, which can build stronger freehand skills, but it also demands more manual comparison. Compared with a standard digital drawing app, this experience is aimed at paper-based practice rather than layers, brushes, and editing. If your goal is polished digital painting, a dedicated drawing studio will be the better choice. If your goal is to bridge a reference photo and a physical sketchbook, this approach is more focused.
Where the workflow becomes less comfortable
The same AR overlay that makes placement easier can make the session physically awkward. You need to keep the device positioned so the reference remains useful, and that can compete with the natural posture of drawing. A setup that works for a quick outline may become tiring during a long, detailed study. I would use it for focused stages rather than expecting to leave the guide active for an entire artwork.
There is also a creative limitation in relying too heavily on the reference. The app can help you reproduce placement, but it does not automatically teach perspective, anatomy, lighting, composition, or expressive line quality. Someone who wants deep foundational instruction should combine it with deliberate freehand exercises. In particular, practicing only easy front-facing subjects may create confidence that does not transfer to more complex views.
The guided lessons may appeal to beginners, but users who already have a strong drawing routine could find the structured approach less necessary. For them, the adjustable reference overlay may still be useful for a specific project, while the lessons are better treated as occasional prompts. The app is not trying to be an advanced professional tool, and expecting extensive illustration controls would lead to disappointment.
The free price lowers the barrier to trying it, but optional purchases change the calculation for frequent users. I would begin with the free experience and decide whether the available workflow genuinely fits my habits before paying for extras. Since individual purchases can cost from forty-nine cents to nearly fifteen dollars, the sensible approach is to consider how often you will use the additional material rather than assuming every paid item is necessary.
Who should use it and who should choose another route
I would recommend this app to a beginner who wants to draw recognizable subjects on paper, a hobbyist who needs help with initial proportions, or a parent looking for an approachable art activity. It is also a good fit for someone who learns through doing and loses motivation when traditional measuring methods feel too abstract. The combination of a personal photo, a visible page, and guided practice creates a clear starting point.
I would be more cautious if you want a completely screen-free drawing routine. The device is part of the method, so it may distract from the quiet observation that comes with a printed reference or a live subject. I would also point experienced artists toward a conventional reference workflow when the goal is stronger independent construction. A photo, pencil, and measuring method may feel slower, but that friction can be exactly what develops judgment.
For digital artists, this is not a substitute for a layer-based canvas. You will get more control from an app designed around brushes, selections, transformations, and color work. For someone who wants to turn a phone photo into a physical sketch with less uncertainty at the start, however, those tools are beside the point. The choice depends on whether your destination is a paper drawing or a digitally edited image.
My recommendation after using the complete workflow
What I like most is the clear progression from reference selection to placement, construction, review, and personal finishing. The app gives beginners a practical answer to the blank-page problem without pretending that tracing alone creates drawing skill. Its best use is as scaffolding: enough assistance to get started, followed by intentional moments where you look away from the guide and make your own decisions.
I would keep sessions short at first, choose uncomplicated images, and save the final paper result rather than judging the experience only by how closely the first outline matches the photo. Try the same subject again without the overlay after a few days. That comparison will show whether the workflow is improving your observation or merely producing a one-time copy.
Released on December 27, 2025, AR Trace Sketch is a relatively focused addition to the Art & Design space from NimbusApps. Its average rating is currently shown as zero, so I would not use that figure as a reason to dismiss the concept or as proof of quality; I would judge it by whether its AR workflow matches the way you want to practice. The app supports devices running Android 7.0 or later, and its Everyone rating makes the entry point broad.
My final view is positive but measured. Use it when you need help crossing from a reference image to a real sheet of paper, then deliberately step beyond the guide. That is where the app earns its place. If you want a full digital art workstation, advanced drawing theory, or a purely traditional method, another option will serve you better. For approachable photo-based practice with adjustable overlays and guided direction, though, it offers a useful bridge between looking and drawing.
FAQs for AR Trace Sketch
01What is AR Trace Sketch and how does it work?
AR Trace Sketch is an innovative app that allows users to create sketches using augmented reality technology. By projecting a virtual image onto a physical surface, users can trace designs with precision. The app utilizes your device’s camera to overlay images onto real-world environments, making it perfect for artists and hobbyists alike.
02Is AR Trace Sketch suitable for beginners?
Yes, AR Trace Sketch is designed with a user-friendly interface that caters to both beginners and experienced artists. The app provides easy-to-follow tutorials and adjustable settings, allowing users to start with simple shapes and gradually progress to more complex designs. It’s a great tool for learning and enhancing artistic skills.
03What devices are compatible with AR Trace Sketch?
AR Trace Sketch is compatible with most iOS and Android devices that support augmented reality technology. Ensure your device is updated to the latest operating system version for optimal performance. Check the app store listing for specific requirements, as older devices may not fully support all features of the app.
04Are there any in-app purchases or subscriptions required?
AR Trace Sketch offers a free version with basic features, but there are optional in-app purchases for additional tools, templates, and advanced functionalities. Users can choose to subscribe for a premium experience, which includes ad-free usage and exclusive content updates. This flexibility allows users to tailor their experience according to their needs.
05How secure is my personal data when using AR Trace Sketch?
The app prioritizes user privacy and data security. It adheres to strict privacy policies, ensuring that any data collected is used only to enhance user experience and improve app functionality. Users are encouraged to review the privacy policy available within the app to understand how their information is managed and protected.
Pros
- Intuitive interface for easy sketching.
- Wide range of brushes and tools.
- AR feature enhances drawing accuracy.
- Supports multiple file formats.
- Offline mode available for convenience.
Cons
- Limited free version functionality.
- Occasional app crashes reported.
- High battery consumption in AR mode.
- Requires latest OS for full features.
- In-app ads can be intrusive.

AR Trace Sketch
Gallery